|
| |
|
|
| |
 |
| I made this page to
add additional information about using trimix in the Inspiration. It will
show some new features and developments of this area. If you have items or
information to add please let me know. |
| Ik heb deze pagina
toegevoegd om informatie te verschaffen over het gebruik van Trimix in de
Inspiration. Het doel is om vernieuwende zaken hier te presenteren. Als je
zelf foto's of artikelen hebt zijn deze meer dan welkom. |
| GAP, A fantastic piece of Software made by Kees Hofwegen is the key to your Normoxic en Trimix adventures. Please take
care that the updates need to be installed to get the CC part working.
Now available with RGBM model decompression calculations ~EURO 200 |

go to the webshop for the
latest version |
GAP, een schitterend stuk software gemaakt door
Kees Hofwegen, is de sleutel tot Normoxic en Trimix berekeningen. Het
programma is gratis te downloaden. Let op dat je de updates ook installeert
anders werkt het rebreather deel niet! Binnenkort leverbaar tegen een
vergoeding met de RGBM decompressie berekening geintegreerd! (~200 Euro) |
|
 |
-
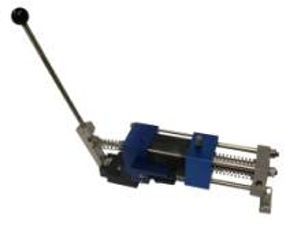
Handpump
-
-
System:
Double push system
-
Weight:
< 18 Kg
-
Gaskets: Teflon gaskets
-
Valves: shutter valves
-
Lubrication: WITHOUT any CREASE
-
Deviations: length 510mm, wide 210mm,
height with lever 290mm,
-
without 170mm, lever 1200mm
-
Built
up: steel, stainless and brass
-
Min pressure:
storage tank 20 bar
-
Max pressure:
200 bar
-
-
Price:
without gauge, hoses, pin valves
-
� 1.800 plus shipping
-
-
delivery time:
6 - 8 weeks after appointment
-
payment:
40% by order, tail by supply
-
visa, mastercard, bank order=20
-
-
ALL IS OXYGEN CLEAN
-
-
Supplementary
equipment
-
Hoses with stainless
steel cover
-
Oxygen gauge
-
Needle valve
-
Connector =BE Thread
and 5/8 Thread
-
-
DEEP BANDITS
-
Chris Ullmann
-
Seerichterstr. 29
-
D-86911 Die�en
-
e-mail: deepbandits@t-online.de
-
-
|
Oxygen Booster made by Deepbandits
Very reasonable price. ( Euro 1800)
Take a look at: Deepbandits |
|
Zuurstof booster tegen zeer betaalbaar tarief.
Beschikbaar bij Chris Ullmann van
Deepbandits Duitsland. |
| There are new models
available through Deepbandits now. Check out this page
here |
|
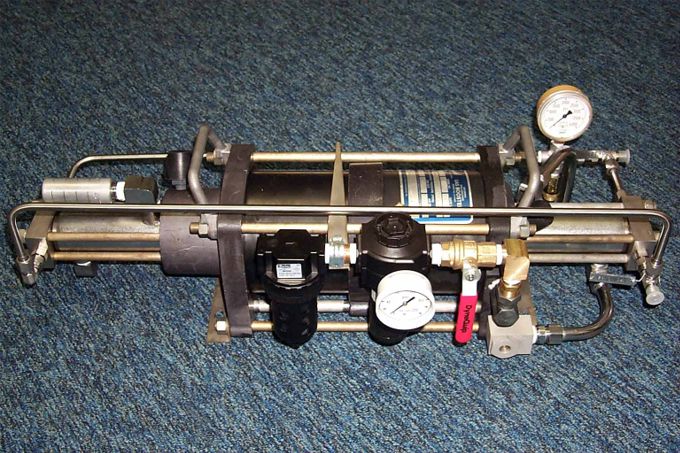 |
| Here you find a picture of a
professional HASKEL airdriven Booster PUMP. If you are interested in
boosters like these, also second hand contact:
www.americanairworks.com and
ask for Mr. Ray Lambert. |
| |
|
 |
|
http://www.silentdiving.com/booster.php |
|
Another booster: |
|
http://www.jj-technique.com/Expedition_htm/booster_main.htm |
| |
| |
|
|
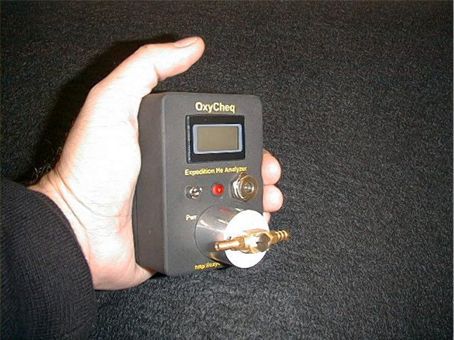
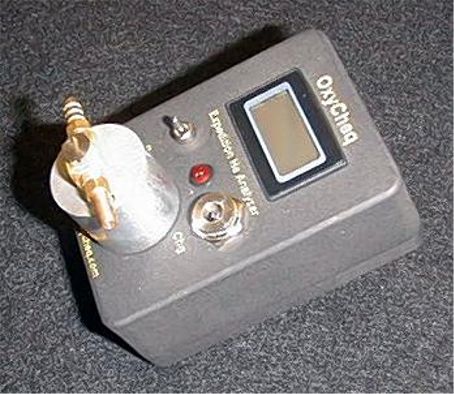
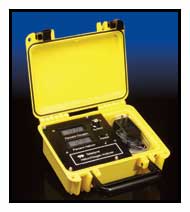
NEW: Helium analyzer By Oxycheck
This information I received from Patrick Duffy.The analyzer will be shown at
DEMA this year |
|
NIEUW: Helium analyser van Oxycheck. Deze
informatie werd mij verstrekt door Patrick Duffy van Oxycheck. Hier zie je
een betaalbare Helium analyser. Demo's op de DEMA in de USA
dit jaar. |
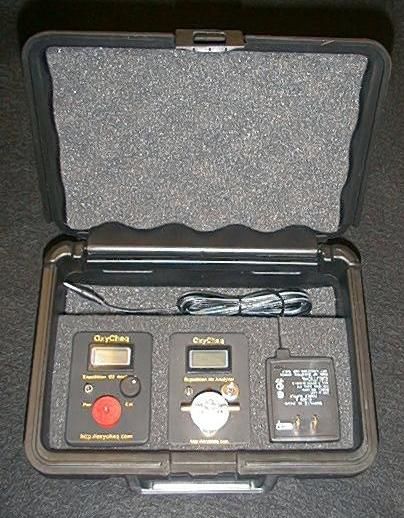
The Expedition Helium Analyzer will
come with the analyzer itself, a rechargeable battery pack, your choice of a
110v or 220v smart charger, and carrying case. The carrying case is large
enough to fit the Helium Analyzer, the smart charger and an Expedition O2
Analyzer. You can sample both helium and oxygen at the same time by
connecting both units with a small piece of tubing or they can be used
independently. The photo below shows the case holding both the He and O2
analyzers as well as the smart charger. There is also room on top for a
flow restrictor or other parts.
|
 |
|
The Expedition Helium Analyzer uses
the same electronics enclosure as the Expedition O2 Analyzer, so it is
small. It can be used as a hand held unit or can easily be wall or panel
mounted.
The He Analyzer is very easy to use. Flow the gas, turn the unit on, push
the sensor cap down to grab a sample of gas, and within one minute you will
have a reading within 1% accuracy. When testing it against known gases, we
were actually within .5% accuracy, but will claim 1%. Readings were
completed in less than 30 seconds for gasses over 90% and 15 seconds for
under 50%. We'll claim an accurate reading within 1 minute.
I think you will be impressed with the ease of use as well as the
performance.
The OxyCheq Expedition Helium Analyzer has a suggested retail price of $950.
Extra rechargeable battery packs (you should not need them soon) and smart
chargers will also be made available. The smart chargers are custom made
specifically for the Helium Analyzer, they are not off the shelf items.
I have attached a copy of the
"Operator's Manual" for your review. You can also look in the
Download section
|
| |
 |
 |
|
The moment someone
releases a new product, there are always more products to find. If they are
newer or better is for you to judge. This input has to do with Atomox and
was sent to me by Paul Buskermolen, thanks Paul !!
Later I received additional information from Brad Gilmore.
Atomox produces Helium analyzers since 2000. They supply three models as
shown here.
Thanks for the input Brad! |
|
PRINCIPLE OF MEASUREMENT
The
ATOMOX HeLIUM ANALYZER�
(and other analyzers), operate by comparing the thermal conductivity of the
sample gas to the thermal conductivity of a reference gas housed in a sealed
cell. This technique to determine helium was first reported in the
scientific literature in 1908 and is still used today.
Thermal conductivity gas analysis is remarkably sensitive and is often used
to measure hydrogen, carbon dioxide and other gases in addition to helium.
These gases are normally measured in a background of air, but the sensors
operate just as well in a background of nitrogen or when monitoring two
inert gases.
The
ATOMOX analyzers determine the helium composition by continuously comparing
the sample gas to the reference gas. This comparison is performed in a
two-cell explosion proof sensor housing. The reference gas is sealed into a
closed cell and will not change. The sample gas flows through and across the
other cell. A temperature-sensitive heated filament is mounted in each cell.
These filaments are part of a Wheatstone Bridge circuit. When the sample gas
composition changes, its thermal conductivity will also change. This means
it will conduct a different amount of heat away from the filaments. Since
the resistance of the filaments is a function of their temperature, their
resistance changes when the sample gas composition changes. Any such change
creates an imbalance in the Wheatstone Bridge, resulting in an electrical
signal output proportional to the change. This technique allows the ATOMOX
analyzers to provide an accurate measure of any change in sample gas
composition.
The sensors used in the ATOMOX analyzers are assembled specifically for this
application. The expected life of the sensor is 10 years. The response time
of the analyzer to changes or variations in gas mixtures can be affected by
the length of the gas supply line, any mixing chambers in line or other
physical obstructions. There generally is a quick (<15 sec.) response to any
change in gas composition. The helium concentration is updated every 1
second while the unit is on.
The basic assumption for the analyzers to work is that the gases in the
mixture are known (i.e. oxygen, nitrogen, helium). Minor amounts (< 1 %
total) of trace gases will not significantly alter the output of the
analyzer and can be ignored. The sensor is non-specific, it will not
indicate if the test gas has CO2, Argon or any other gas in the
mix. It will only determine the relative difference in thermal conductivity
of the test gas to the reference cell. It is assumed that the difference is
the result of the addition of helium to the gas mixture.
The ATOMOX analyzers are not meant to replace good gas management practices
or handling techniques. They are an additional tool to verify the content of
helium in a scuba gas mixture.
|
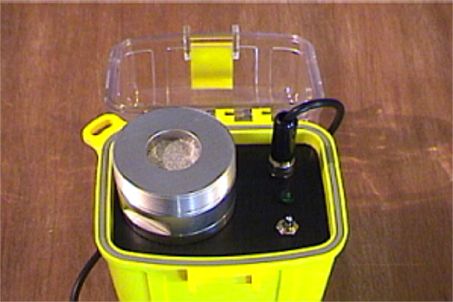 |
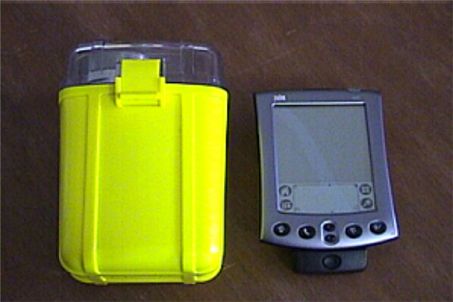
Front View
This is a view of the new ATOMOX HAND HeLIUM ANALYZER�
showing its compact size. The housing is an Otter Box 8000. |
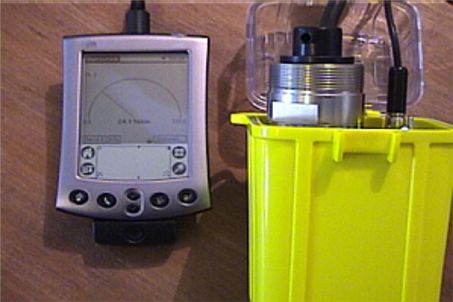
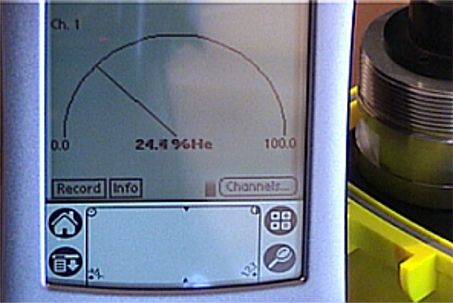
Gauge Display Mode
This is the screen of the Palm with the display set to gauge mode. |
 |
 |
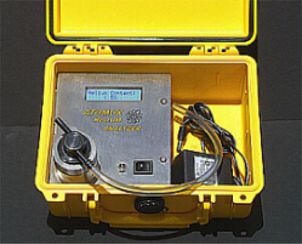
Front View
This is a working view of the new ATOMOX HAND HeLIUM ANALYZER�. |
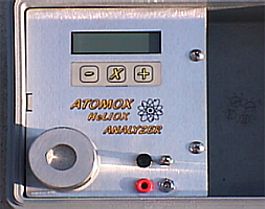
Front View
This is a closeup view of the ATOMOX HAND HeLIUM ANALYZER�
sensor housing. |
 |
 |
Helium and Oxygen analyser
Features:
Oxygen and helium gas analysis capability. You
can now determine the helium AND oxygen concentrations at the same time with
one compact unit.
Helium and Oxygen results are displayed simultaneously in an easy
to read format so there is no confusion about the mix.
One button calibration to air (20.9%).
Other concentrations can be easily selected by the user.
Supplied with a rechargeable NiMH battery
pack. The battery pack is the same size and voltage as common
Radio-Controlled cars so spares, replacements and chargers can be found
almost anywhere.
Locking On/Off/On toggle switch. The
locking toggle switch eliminates the possibility of the analyzer turning on
during transport.
Illuminated display. The backlight is
selectable with the new 3-position locking toggle switch and provides an
easy to read format for low light conditions.
Improved signal capture and error
correction. The new design results in signal resolution more than 10 times
greater with less error. The result is improved precision and accuracy.
Digital temperature correction for ambient
conditions for helium. This is only one of the many improvements in the new
circuit design. |
|
Key points of the ATOMOX HeLIUM ANALYZER�
The unit can be used for mixes of N2, O2
and He with an O2 content ranging from 10% to 40%, and a helium
content of 5% to 90% with an error range of +/- 1%.
The detection and analysis method is non destructive. An
oxygen sensor can be placed in line with this unit to determine the O2
content at the same time.
The sensor is packaged as a complete, flameproof gas
detection head in a stainless steel enclosure. Therefore, if you run a high
oxygen content gas over the sensor it will not ignite.
The expected life of the sensor is greater than 10 years.
The sensors are extremely robust, once calibrated they
rarely fall out of calibration and need little to no maintenance.
The unit does need an initial warm-up period of 5 minutes to
stabilize. The gas mixture is then sampled and updated every 3 seconds when
the unit is turned on. The response time is typically less than 15 seconds.
The ambient operating temperature range is 5oC to
40oC, (41oF to 104oF); Storage temperature
is -20oC to 60oC (-4oF to 140oF).
The total unit is enclosed in a Pelican 1150 case and is
easily portable. The outside dimensions of the case are 7.75W x 9.25L x
4.5H.
The unit is battery operated and can also be powered with a
supplied DC power supply (wall transformer). |
 |
Info:
http://www.teledyne-ai.com/products/mixchek.html |
|
Mixchek Helium / Oxygen
Analyzer
|
PORTABLE VERSION
- Easy to read 3.5 digit LCD display
- Optional oxygen analysis with long life (35 month) sensor
- Operate for 150 hours on four C batteries with AC power adapter
- On / Off switch to conserve power
- Linearized output
- Waterproof plastic case
- Solid state TC sensor
- Long life (36 month) R-22DHO high output oxygen sensor drivers LCD
directly
- 3/16� x 4 ft. sample line
|
|
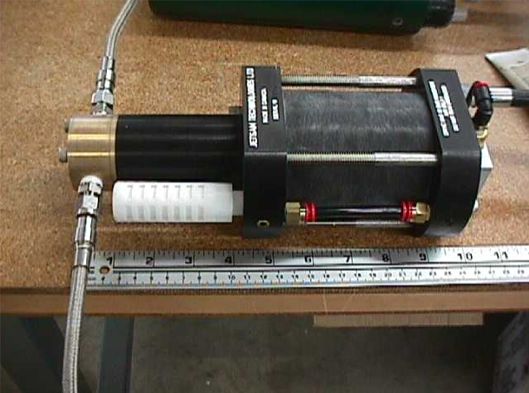
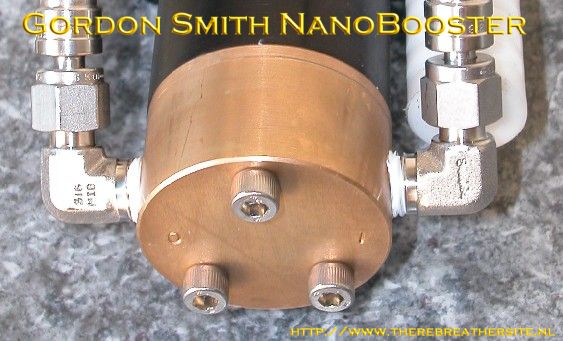
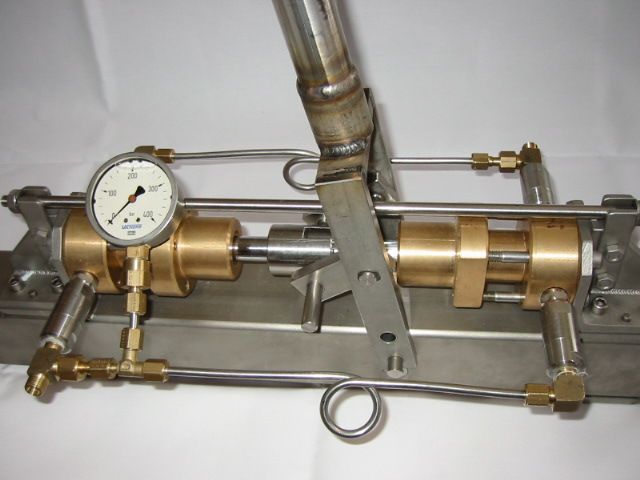
Gordon Smith's NANOBOOSTER. Check a great review
here |
| And
here a report from Tino de Rijk about the Nanobooster: |
A couple of weeks ago I was one of the first happy people to become the
proud owner of a NanoBooster, a pneumatic-driven gas booster pump made by
Jetsam Technologies in Canada. Jetsam is owned by the very friendly Mr.
Gordon Smith and is better known for the manufacturing of the Kiss
rebreather, a manually-controlled CCR "competitor" of the Inspiration.-
- There have already been some reports on
this list, but not very detailed, so here goes for the detail-freaks
amongst you. If you hate techno blabla: skip the remainder of this mail,
and go drink a beer. Here goes:
-
- Size: 30 cm long, 11 cm high & 11 cm
wide. Weight: only a little over 3 kilo due to heavy use of light
materials. In other words: small & light, so easy to carry.
-
- The pump has all the signs of a serious
thought-through product. Not a piece of hobby kit thrown together: very
well made, with perfect professional finish & parts, and easy to maintain.
-
- Price: contact Gordon at Jetsam for
details, but as far as I know $ 1200 for the bare pump, and $ 1700 for
pump including hoses (HP in- and outlet), excl. transport & EU taxes where
applicable (@#$*&(*&@(*&@(&(&@ ...).
-
- Nice little detail: you drive the pump
with max. 10 bar air, so typically from a first stage regulator. The pump
is however already fitted with a male LP inflator connector, so just plug
in your intermediate pressure hose and there you go! No hoses or funny
expensive connectors needed to drive it.
-
- I chose to get the pump without hoses,
and got my hoses from the equally friendly and professional mr. Colin
Glass at Undersea Ltd. In Dorsett, UK. He solved a little "problem" the
pump has: the HP in- and outlet are of the US/Canadian � NPT type, so not
the in Europe custom straight and O-ring sealed � BSP type. NPT is a
conical tapered connection, i.e. sealed with Teflon tape rather than an
O-ring. But Undersea carries these adapters, so no problem. You might also
get them from companies like Swagelock, but those are very expensive
(especially if you only want two or so), and as such a waste of money.
Colin usually has them on stock. See also
www.subaqua-products.co.uk/Catalogue for various hose parts &
adapters. You won't find the NPT-to-BSP adapter there, but he *does* carry
them.
-
- I kept the hoses as simple as possible:
flexible PTFE/stainless HP hoses with male DIN in- and outlets with bleed
on both sides. Since I already had a DIN-to-bullnose adapter, this way I
can connect to both big bullnose-fitted J-type storage cylinders as well
as a 10 or 15 liter O2-serviced diving cylinder pumped up with oxygen at
home beforehand for a week of self-supporting diving anywere. I also
already had a detachable digital HP gauge on a DIN-to-DIN pass-through
T-piece (also available from Undersea), so didn't need to fit that on the
hose also. Modular & reusable is my word in these things (and cheap, since
I'm Dutch...).
-
- Performance:
-
- That depends heavily on in- and outlet
pressure, and drive gas pressure. I bought a very simple and cheap
Scubapro MKII piston-driven first stage with LP inflator hose. This cheapo
gives a nice 9,6 bar inter stage pressure, so perfect for the pump. To
give an idea on performance:
-
-
- Inlet pressure from J-cylinder: 100 bar;
-
- Drive gas as described above: 9,6 bar;
-
- Pumping a 3 liter Inspiration cylinder from 100 to 200 bar takes
around 8 minutes. 160 bar is reached well within 5 minutes.
-
- Advantage of this slow speed is also that
the cylinder doesn't heat up too much, which is also safe.
-
- Noise is neglect able, as Gordon fitted
the NanoBooster with a very effective muffler, so no hissing, only a
once-every-few-seconds "plunk" when the piston gets a kick under its ass.
-
- Driving the pressure above 200 bar takes
excessive amounts of drive gas and becomes very slow, so is not
recommended. I stick to around 200 bar (depending on inlet gas pressure),
which is reached relatively fast. From my first experiences I'd say a
1:2,5 ratio gives fast result, i.e. filling a 3-liter to 200 bar from a 80
bar supply cylinder. As the in- and outlet pressures are more closely
together, pumping obviously also goes faster (i.e. pumping from 150 to 200
bar or so). Ratios beyond 1:4 are not realistically recommended due to
speed and drive gas consumption.
-
- Drive gas usage:
-
- Pumping two 3-liter cylinders from 100 to
200 bar, with 100 bar inlet supply gas, takes 2/3 of a 10 liter 200 bar
drivegas cylinder with air. Quite a lot, but easy & cheap to get, so who
cares?... And the drivegas doesn't have to be O2-clean; ordinary diving
air quality will do (although the cleaner the drivegas, the less dirt and
wear & tear the booster will suffer, lengthening lifetime).
-
- Operation:
-
- Gordon hasn't yet written a manual, but
operation sequence is simple:
-
-
- Open inlet gas (=supply gas, J-cylinder);
-
- Open outlet gas (=cylinder to get filled);
-
- Optionally wait for gasses to equalize, flowing through the
pump,when input pressure is higher than output pressure;
-
- Hook up drive gas, wait for the sound of the "plunks", and watch the
pressure rise in awesome admiration.
-
- When finished:
-
-
- Cut drive gas to stop pump action (i.e. close drive gas cylinder
with air).
-
- Close in- and outlet valves;
-
- Bleed in- and outlet HP lines;
-
- Detach inlet, outlet and drive gas hoses.
-
- Go diving.
-
-
- Maintenance:
-
- Again, no manual available yet, but I had
to service mine because it stopped pumping after a week. Cause: a little
piece of dirt had entered the pump, stopping the inlet valve to close
properly. Lots of "plunks", but no rise in pressure. "Repair" took less
than 10 minutes, and only one (unfortunately also non-metric, US) imbus
key (I think the Limeys call this an Allen key).
-
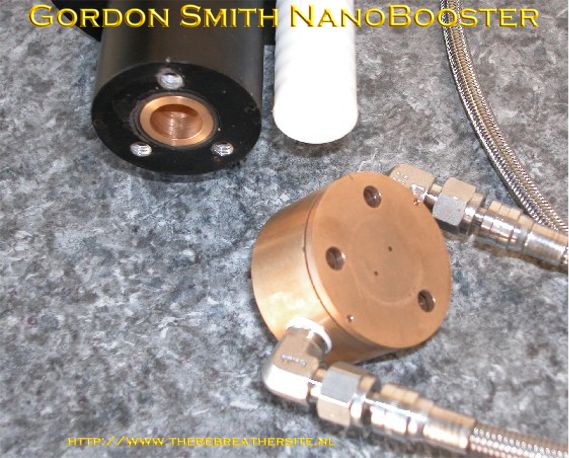
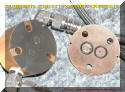
- Simply remove the three hexagon
screws/Allen bolts from the head, and off comes the head in three parts:
-
-
- Top part with in- and outlet hoses;
-
- A very thin (and sensitive, so handle with great care!) stainless
plate with cutouts that from the S/S reed-valves;
-
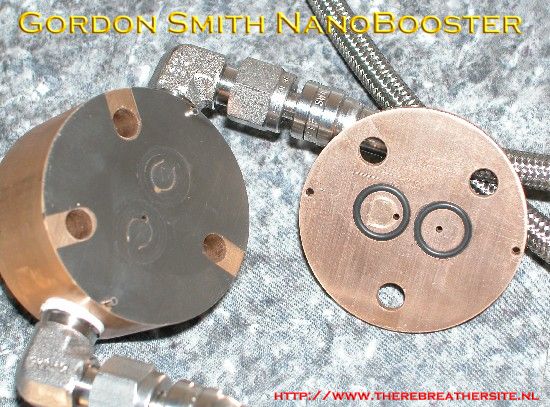
- The bottom part with the two holes to the piston room.
-
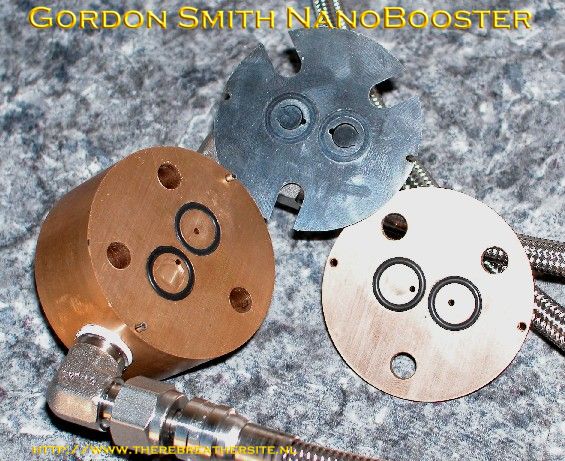
- The top- and bottom plates contain
O-rings, the center part with the read valves itself is just a thin piece
of pre-cut stainless steel.
-
- I just wiped the little piece of dirt off
one of the reed-valves on the thin center plate, re-assembled, and it
acted flawlessly again. Not very difficult at all.
-
- Gordon recommends disassembly and
cleaning once a year, applying a very little bit of O2-compatible grease
to O-rings and read-valve plate. Again: 10 minutes work, only one Allen
key needed. Beautiful.
-
- Alternate use: I now also boost my
diluent (air mostly) with it. Take care though of course to use only
oxygen-clean air (i.e. from oxygen-service cylinders and compressors), as
you do not want the pump to get dirty when the next time you pump
high-pressure O2 again..
-
- But this way I can boost both diluent and
O2 to 200+ bar, from simple diving cylinders, at home, without having to
go for the filling station for top-ups (and paying for it.). Top!
-
- Bottom line:
-
- What is the ROI (Return on Investment) of
this little gem? You can rent a hell of a lot of oxygen J-cylinders for
around USD 1700, and return them half-empty as I used to do.
-
- But besides the trouble or ordering,
swapping bloody big heavy cylinders etc. this little beauty offers a
priceless thing: safety. Now you go diving
- *each* time with a fully loaded 200 bar
of oxygen & diluent. So additional bailout volume. Same of course applies
to your sidemounts etc.
-
- And the thing will pump Helium also,
which brings the ROI home *very* fast, as you can empty your Helium
storage cylinders to, say, 20 bar (at that pressure still giving, say, 50
bar output pressure).
-
- And how about making "ideal" trimix
mixtures, which means having to add oxygen at high pressures on top of the
earlier filled helium? No problem, and again a contribution to safety as
opposed to HeliAir mixtures.
-
- It certainly has my vote!
-
- Ciao,
-
- Tino de Rijk Netherlands.
-
|
| |
 |
 |
 |
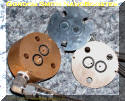 |
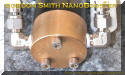
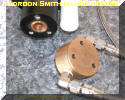
| click
the pictures for a detailed view |
| Pictures thanks to Philippe Sudan (CH) and Tino de Rijk (NL) |
|
Additional reference:
http://www.drogon.net/scuba/KISS-Air-Booster.html |
|
latest update 07-March-2005 |
|
|
|